Build Your First Agent in Agentforce: Step-by-Step Guide
Everyone’s been talking about Agentforce and you’re wondering what it can do for you? One of the best ways to quickly gauge the value of any new tool or feature is to play around with it. And even though Salesforce keeps the barrier of entry pretty low for this one, the initial start can be rocky. That’s why we’ve come up with a step-by-step guide on how to build a simple but fully functioning Case Management Agent in under an hour.
Introduction to Agentforce
Salesforce Agentforce is a platform that businesses can use to create and deploy autonomous AI agents. These agents are capable of performing tasks across functions such as sales, service, marketing, and commerce. Unlike other AI systems that rely on human prompts, Agentforce agents can operate independently, make decisions and perform actions without constant human intervention. Learn more about the basics of Agentforce.

How to get started with Agentforce
When building your first Agentforce agent, it’s best to start with a small, simple use case that solves a specific, repetitive problem – like retrieving order information, checking case statuses or finding internal assets. These tasks are narrow in scope, easy to define, and give you a solid foundation for understanding how Agentforce works without being overwhelmed.
You might worry that your data needs to be perfectly clean before you can begin, so the agent performs tasks accurately. This is not the case. While high-quality data becomes more important as agents grow in complexity and scope, you don’t need to worry for smaller, well-defined use cases. On top of that, Agentforce is designed to handle real-world data, which is often messy. With Salesforce tools like Flows, Data Cloud, and built-in error handling, your agent can adapt to imperfect data, ask clarifying questions, and operate effectively within defined boundaries.
The key is to get started – don’t let the pursuit of perfection delay progress. Focus on building a functional agent first, and then refine your data and agent logic iteratively as you test and learn. This approach allows you to see value quickly and improve as you go.
Defining What to Build: Start with a Simple Use Case
The first step in building your Agentforce agent is deciding on a clear, manageable use case. Salesforce provides a couple of templates to help you get started, but for this tutorial, we’re focusing on a Case Management Agent that retrieves order information. This practical example keeps things straightforward while introducing you to the foundational steps of Agentforce.

How the Agent Works
Here’s a breakdown of what this Case Management Agent will do:
- Conversation Start: The user initiates a chat with the agent.
- Greeting: The agent welcomes the user with a friendly, predefined message.
- Identification: The agent asks for identification details, such as a customer number or email address.
- Request: The user asks to see their order details.
- Activate Topic: The agent activates the “Order Information” topic, scoped specifically to retrieving order details.
- Action: The agent fetches real-time order information from Salesforce.
Presentation: The agent displays the retrieved order details in a clear, easy-to-read format.
Your Role as the Builder
With Agentforce, your role as the builder is fundamentally different from traditional chatbot design. Instead of crafting rigid if/then logic or predicting every possible user input, you’re now guiding an intelligent agent that can understand intent, adapt to user requests, and connect to Salesforce data. This means you don’t have to anticipate exact keywords or painstakingly map out conversation flows.
Your job is to focus on the essentials:
- define what tasks the agent should handle
- provide clear instructions for performing those tasks
- and connect the agent to your Salesforce data using tools like Flows
Agentforce takes care of the rest – interpreting user intent, activating the right topic, and responding naturally, even when inputs are ambiguous. By starting with a simple use case you’ll experience firsthand how this approach allows you to build smarter, more flexible agents with far less effort. Let’s dive in!
Step-by-Step to Your Order Information Agent
The next bit will get technical. Just remember: take it one step at a time, and you’ll see your agent come together quickly!
1. Create a New Agent
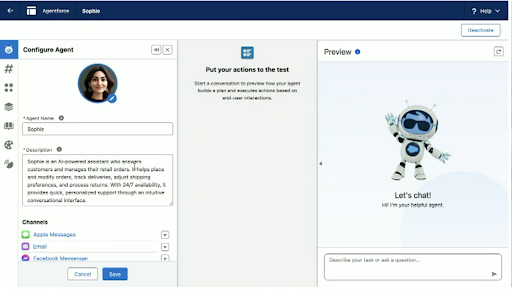
- First, set up Salesforce Foundations as described here.
- Go to Setup in your Salesforce org.
- Use the Quick Find bar to search for “Agents”.
- Click New Agent (Pilot).
- Fill in the following details:
- Label: “Case Agent”
- Description: “Agent for retrieving customer order information.”
- Agent User: Set to Custom Agent User.
- Enable Enhanced Event Logs for tracking interactions.
- Click Create.
- Open the agent in Agent Builder:
- Click the dropdown next to the agent’s name.
- Select Open in Builder.
2. Add Topics
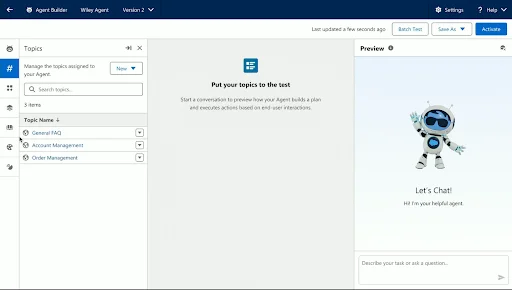
Topics categorize tasks the agent can handle. This makes it easier to manage and organize its capabilities. By clearly defining topics, you ensure the agent remains focused on relevant tasks, which keeps it manageable and avoids unnecessary complexity – especially for beginners. The Scope in turn defines what the agent is allowed to do once the topic is activated.

Add a New Topic:
- Go to Topics within Agent Builder.
- Click New Topic and enter:
- Label: “Order Lookup”
- Description: “Retrieve order details based on customer ID or email.”
- Scope: Define that this topic can only retrieve order history.
- Add Instructions:
- “When the user requests their order details, fetch the order history using the provided email or customer ID. Present the results in a table.”
- Test the topic using Conversation Preview to test and refine topics.
3. Configure Actions
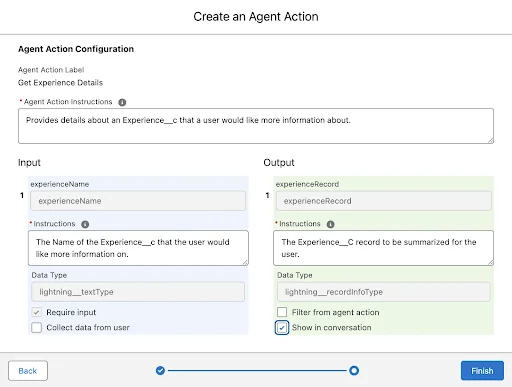
Actions allow your agent to interact with Salesforce by performing specific tasks, such as fetching order information. They serve as the bridge between the agent’s logic and Salesforce functionality, leveraging tools like Salesforce Flows to automate processes and deliver real-time data.

Add an Action to Retrieve Order History:
- Navigate to Actions in Agent Builder.
- Add a Standard Action:
- Example: “Identify Customer by Email”.
- Create a Custom Action for retrieving orders:
- Use Salesforce Flow to implement this action.
- Go to Setup > Flows and create a new Record Lookup Flow:
- Input Variables: Customer email or ID.
- Output: List of orders (Order ID, Product, Date, Status).
- Activate the flow.
- Link this Custom Action to the Order Lookup topic.
- Test the action via Conversation Preview.
4. Deploy and Customize the Agent
Now that your Case Agent is functional, deploy it for user interactions.
Deployment Steps:
- Publish the agent on desired channels (e.g., website, Experience Sites).
- Configure System Messages:
- Example Greeting: “Welcome! I can assist you with your orders. Please provide your email address or customer ID.”
- Define Escalation Rules:
- If the agent cannot retrieve orders, escalate the conversation to a human agent.
Considerations and Closing Thoughts
By starting with an easy yet well-scoped use case, you’ve learned how to define tasks, create topics, and configure actions that connect your agent to real-time Salesforce data. As you expand beyond this initial project, keep a few important considerations in mind:
- Unstructured Data: Don’t hesitate to tap into tools like Salesforce Data Cloud or Search Indexes when your agent needs to access broader or messier datasets. These tools can help your agent find and interpret the right information even in complex scenarios.
- Knowledge Articles: If users frequently ask questions that rely on existing documentation, enable your agent to reference Salesforce Knowledge Articles.
- Iterative Improvement: Agents are never set in stone. Test, refine, and expand their capabilities as you learn more about your users’ needs and the data they interact with.
What makes Agentforce powerful is its flexibility: you don’t need perfectly clean data, and you don’t have to anticipate every user input. Instead, focus on building agents that solve real problems, then refine them over time.
Interested in exploring Agentforce’s possibilities further or do you have any questions we didn’t cover in this guide? Just reach out.